Last Updated on November 29, 2022 by Bestusefultips
Use Snipping Tool: As everyone knows, Microsoft has made most of the changes in Windows 11 OS. There are lots of new features added in the latest Windows 11. Snip & Sketch and the Snipping tool are two examples of these. The new tool retains the name “Snipping tool” even though it incorporates both elements. Here, you can get all the answers about the Windows snipping tool.
You can snap screenshots with the new snipping tool Windows in various ways. You can instantly grab a window or the entire screen, chooses a rectangle, or activate the free mode. The new editor, which allows you to edit, comment, and save or share screenshots, is the second dimension of the experience.
Read Also: How to Use Find My Device Windows 11
How to Snip on Windows 11 Laptop/PC
There are several key sections in this guide. The first part will cover how to snip on Windows from Search.
On the other hand, the second section discusses the Snipping Tool keyboard shortcut.
How to Use Windows 11 Snipping Tool
Searching for the snipping tool Windows 11 search feature is one way to find and utilize it. The processes and screenshots listed below should be performed to accomplish this task.
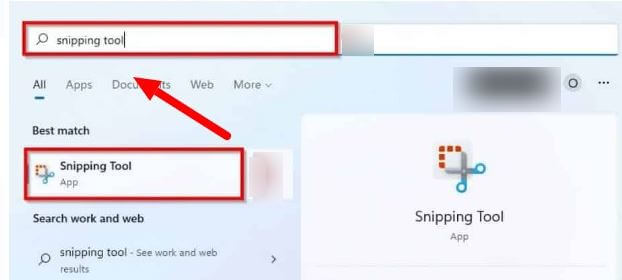
Step 1: Look for the Search icon on Windows 11 taskbar and type Snipping tool.
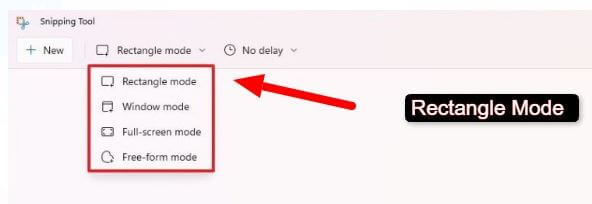
Step 2: Once the Snipping tool opens, click on the Snipping Mode drop-down and select rectangle mode.
Step 3: Click on New in the left corner.
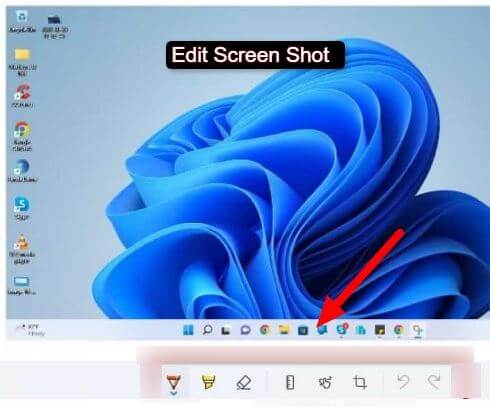
Step 4: The Snipping tool Windows 11 will automatically display anything you screenshot. As a result, you can Edit your screenshot using the tools available in the app.
The tools in the top-right corner of the Snipping Tool for Windows allow you to Zoom, Save, Copy, and Share your screenshot.
Snipping Tool Shortcut Windows
Do you know that Windows 11’s Snipping Tool may also be used via a keyboard shortcut? In short, the Snipping Tool starts when you click the Windows + Shift + S buttons on your keyboard.
As a result, you can screenshot any area or element on your computer’s screen in the standard snipping mode. Anything you screenshot will then be immediately copied to the clipboard.
Set Snipping Tool settings
The Snipping Tool allows users to customize several settings.
Follow the below steps to modify the app’s settings:
Step 1: Click on Start.
Step 2: Look for the Snipping tool on the top result.
Step 3: Click on See More from the settings.

Step 4: Inside the Settings page, enable or disable the option:
Automatically copies the captured image to the clipboard for quick pasting onto documents.
Save snips – As you shut down the editor, it prompts you to save the capture.
Multiple windows – For each capture, a new app instance is launched.
Snip outline: Automatically adds borders to each snip.
Step 5: Select the app theme in the Appearance.
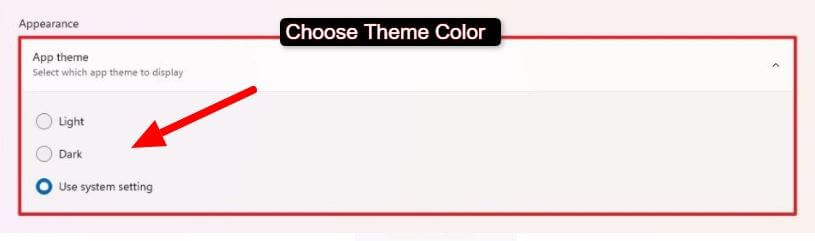
Step 6: Choose a theme color: Light, Dark, or Use System setting.
Step 7: Click the Change in settings button for the Print Screen shortcut setting under the “Shortcuts” section.
Step 8: Select the Yes button.
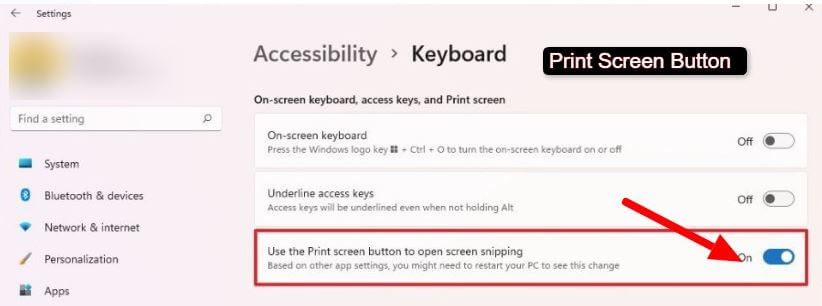
Step 9: To apply the Print screen button rather than just the Windows key + Shift + S shortcut to activate the tool, turn on the toggle switch labeled Use the Print Screen button to open screen snipping.
Once all the steps are completed, all the options will automatically apply.
I hope you find about article helpful. If you have any other steps, please reply in the comment section and share the article with your friends. Please stay connected with us to learn about tips and tricks of Windows 11. We will share all the steps to make your Windows 11 System updates and tricks to solve all the problems of your Windows 11.
Related: