Last Updated on April 22, 2023 by Bestusefultips
Here’s how to delete or remove your Google account from Android, Samsung, OnePlus, and other devices. You can easily add or delete the Gmail account on your Android devices. Removing this Google email account from your device will delete all the account’s emails, contacts, and other data from all your devices using this Email. You can remove a Google email account using your Gmail app and personal account settings of your Android phone device without a factory reset.
By default, it automatically syncs all your data when you sign in to your Google account, like messages, photos, videos, etc. If you want to sell your phone or share your phone with your friends, delete your Gmail account from your Android or PC.
Read More: How to Delete WhatsApp Backup from Google Drive
How To Remove Your Google Account From Android Phones and Tablets
Check out the below-given methods to remove a Gmail account from your Android, Samsung Galaxy, OnePlus, and other devices.
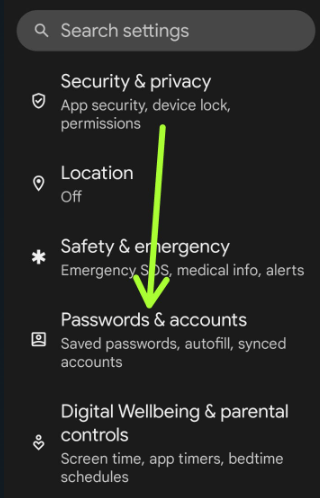
Step 1: Go to Settings.
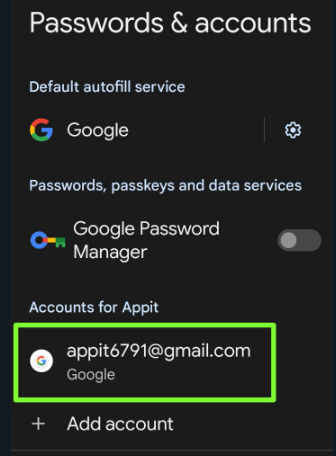
Step 2: Scroll down and tap on Passwords & Accounts.
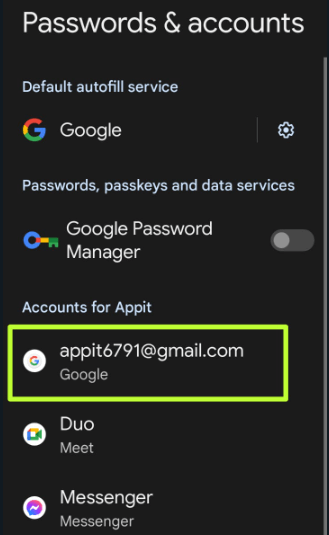
Step 3: Tap on your Google account.
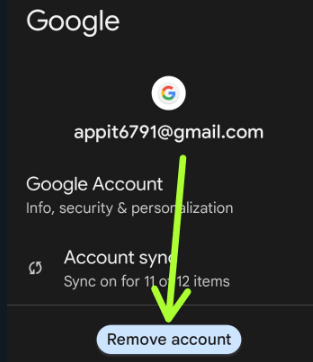
Step 4: Tap Remove account.
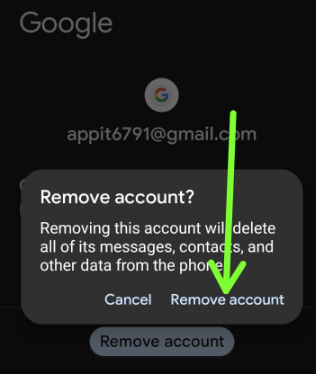
Step 5: Tap Remove account.
How to Remove a Google Account on Android 10, Android 9 (Pie)
Settings app > Accounts > Tap Google account from list > Remove Account > Remove account.
How to Remove a Google Account on Android 7.1.2 (Nougat) and Android 8.1 (Oreo)
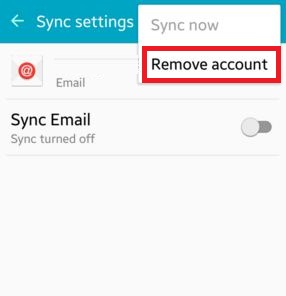
Settings > Accounts under the Personal section > Tap your Google account > Three vertical dots at the top right corner > Remove account > Remove account.
How to Remove a Google Account on Android 6.0 (Marshmallow) and 5.1.2 (Lollipop)
Settings > Accounts > Email > Tap your Google account > More at the top right corner > Remove account > Remove account.
How to Remove Your Google Account from Samsung Galaxy (One UI 5.1) Without Password
Settings > Accounts & backup > Manage accounts > Select your Google account > Remove account > Remove account.
How to Remove All Google Accounts at Once on Your Android Phone
To remove all accounts you use on your device, you must perform a factory reset on your Android phone. It will delete all your phone data, including your Google account, WhatsApp account, photos, videos, third-party apps, etc. Please back up your data before deleting them. Follow the below-given steps to factory reset your Android phone.
Step 1: Go to Settings.
Step 2: Scroll down and tap on System.
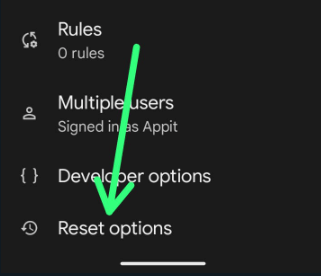
Step 3: Scroll down at the end and tap Reset options.
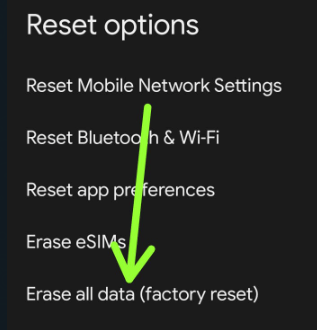
Step 4: Tap Erase all data (Factory reset).
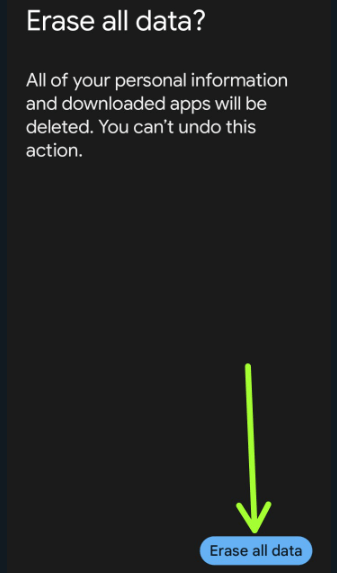
Step 5: Tap Erase all data at the bottom right corner.
Step 6: Unlock your device.
Step 7: Tap Erase all data button at the bottom right.
How to Remove a Gmail Account from the Gmail App in 2023
Step 1: Open the Gmail app on your phone.
Step 2: Tap Three horizontal lines at the top left corner.
Step 3: Tap Settings.
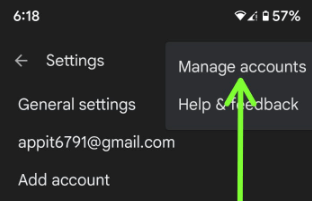
Step 4: Tap on Three vertical dots at the top right corner.
Step 5: Tap Manage accounts.
Step 6: Tap on your Gmail account.
Step 7: Tap Remove account.
Step 8: Tap Remove account.
For Android 5.1 (Lollipop) & 6.0 (Marshmallow)
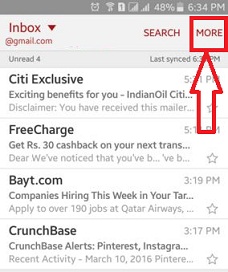
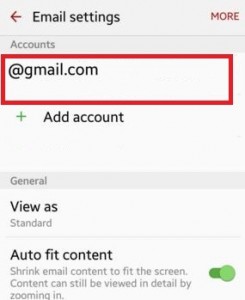
Step 1: Open your Gmail account on your Android devices.
Step 2: Tap on More from the top of the right side corner.
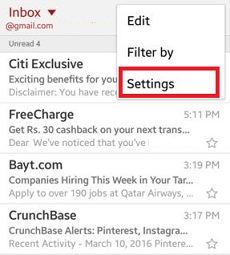
Step 3: Tap on Settings.
Step 4: Click on the Account you want to delete from your Android phone.
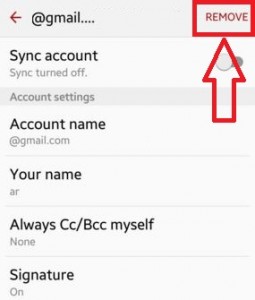
Step 5: Tap on Remove from the top right side corner.
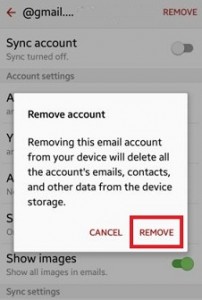
Step 6: You can see the above screen on your device. Click on Remove.
Removing this email account from your device will delete all of its messages, emails, contacts, saved photos, videos, and other data from the device.
How to Add a New Google (Gmail) Account on Your Android Phone
You can add a second Gmail account or remove the existing one and add a new Google account on the latest Android using the below-given settings.
Settings app > Passwords & Accounts > Add account > Google > Verify screen lock > Enter Email or phone > Next > Enter your Password > Next.
That’s it. If you face problems following the steps above to remove your Google account Android phone or tablet, comment below. It would be a pleasure to help you. Stau and connect with us for the latest updates.
Read Also:
