Last Updated on November 18, 2022 by Bestusefultips
Before we go for the steps to fix Windows 11 memory leak issues, what is a Memory Leak? Every system requires memory to operate correctly. Your machine will only work at its highest potential if you have sufficient RAM or memory. Your computer may begin to run slowly, or your apps may stop. If so, you should examine your applications to determine which ones are using up all of your RAM and creating memory leaks in Windows 11 and Windows 10.
What is Memory Leak in Windows 11?
When an application disregards releasing the memory they no longer require so that some other applications can use it, a memory leak results from improper memory usage. Additionally, over time, Windows 11 memory usage increase, and if they are not fixed, your computer starts to run out of memory.
RAM is well-known for providing short-term storage and access to data for your computer. Additionally, your system functions more efficiently because of the sharing of RAM between several programs. A memory leak occurs when a process refuses to relinquish RAM due to an error.
Read Also: How to Fix 0x80070005 Error Code in Windows 11, Windows 10
How to Fix Memory Leak Issue in Windows 11
How do you know if you are facing Memory Leak in your system?
- You might receive the warning sign “Running out of memory” and find the following issues if your machine is low on RAM
- Additional programs can only be launched if there is more free memory.
- Programs that are already running occasionally collapse and freeze.
- Your computer starts to lag and stop responding.
Using a Performance monitor, you can quickly check the RAM on your computer. You can find memory problems on Windows 11.
Fix Memory Issues Windows 11
You must first determine whether (the Windows memory issue) leak or not. To do so, adhere to the instructions below:
Step 1: Open the Start Menu and look for Resource Monitor.
Step 2: Click on Resource Monitor and open the app.
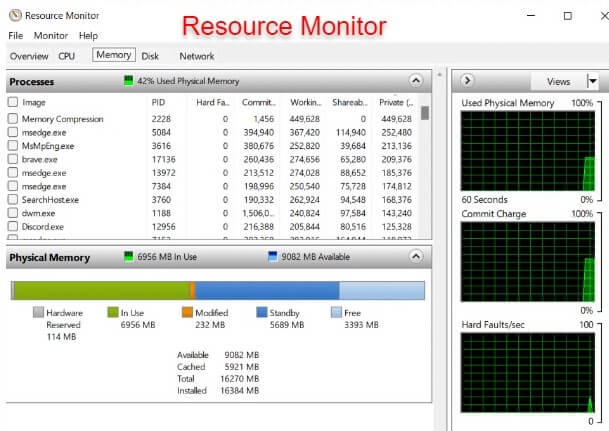
Step 3: Go to the Memory Tab in the Resource Monitor.
Step 4: Verify the memory space here. There will be less memory in idle and less free memory. As a result, therefore you will need to monitor.
Below are the steps to fix Windows memory issue.
Close File Explorer Windows
Many users have noted the File Explorer app to have memory leak issues. Try shutting down Windows 11’s File Explorer to see if it resolves the problem. To stop the File Explorer application, right-click on its taskbar icon and select Close all windows.
The problem you have already been having should be resolved by doing this. If the problem is still present, you should proceed to the following troubleshooting step described in this article.
Apply Changes in File Explorer
You may still encounter issues with the File Explorer even after you’ve made the modifications. As a result, to verify that the memory leak problem is resolved, you must make some modifications to the File Explorer. To do so, follow the below instructions:
Step 1: Click on the Start menu simply by long-pressing the Windows key on the keyboard.
Step 2: Search for the File explorer option and click it to open.
Step 3: Look for the view tab.
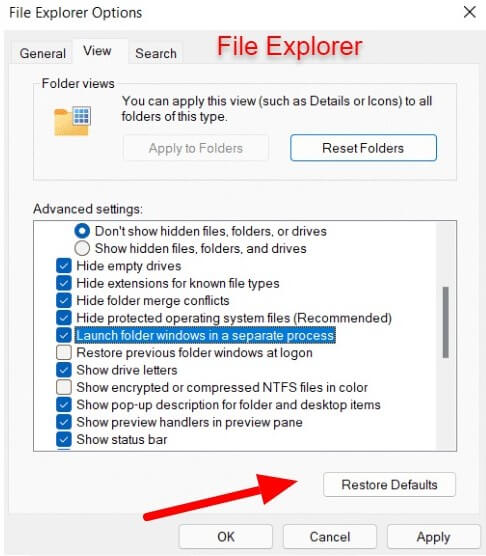
Step 4: Click on Launch folder windows in a separate process. Click Apply, then click OK.
Close Default Browsers and Apps
Disabling any unnecessary browser tabs and applications is yet another option you should try. Memory problems on Windows 11 may also be caused by unused applications running in your system’s background. Here you can try to close all the unwanted browsers and tabs. This will solve the problem. If you are still facing the issue, read this article’s other steps.
Manual RAM Cleaning
Consider manually clearing the RAM or doing so. You can use the Task Manager to perform this. The following actions should be followed to clean the RAM manually:
Step 1: Click on Windows + X or Right-click on the Start icon.
Step 2: From the menu, select Task Manager.
Step 3: Click on the Process tab in Task Manager.
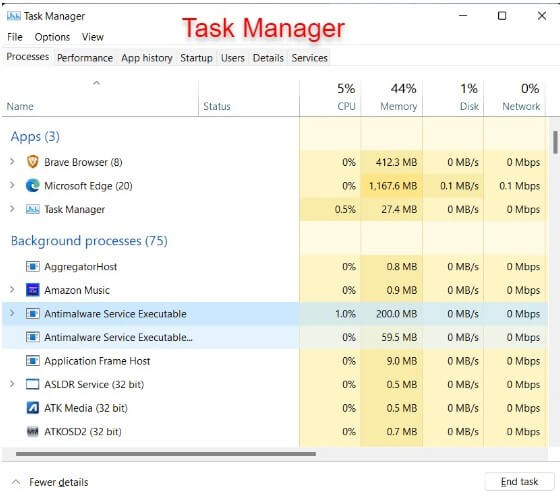
Step 4: Turn off idle running processes that are using a lot of RAM. Select the Task, then click End Task to accomplish this. Which program uses a lot of RAM will be displayed in this section on memory usage.
End Startup Apps
The Startup apps might be closed in an attempt to face memory leak issues. It can consume a lot of RAM when many other applications are open on your computer. This might be the problem of Memory Leak. In order to solve the issue, try closing the start-up apps. Follow the below instruction to do so:
Step 1: Click on the Settings app on your PC/Laptop.
Step 2: Go to the Apps sections in the settings app.
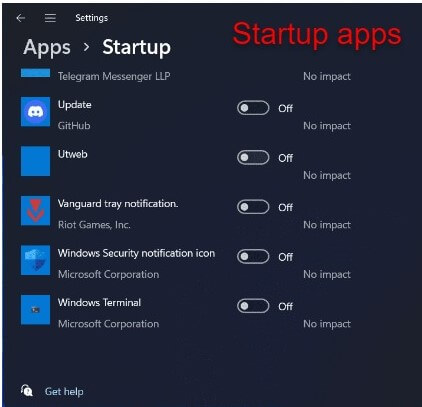
Step 3: Toggle off the apps to create a high impact.
This will stop any startup app that might be the root of your system’s problems.
Check for Windows Update
Sometimes you have windows 11 high memory usage in your system to solve this, and you need to update the windows.
Your problem may be resolved by updating Windows to the latest version. Every new update from Microsoft includes bug improvements, and the Memory leak problem can be resolved with the latest version of Windows. By following this, Windows 11 memory usage can be solved. Follow the procedures below to upgrade to Windows:
Step 1: Open the Settings on your system.
Step 2: On the left side of settings, click on Update Windows.
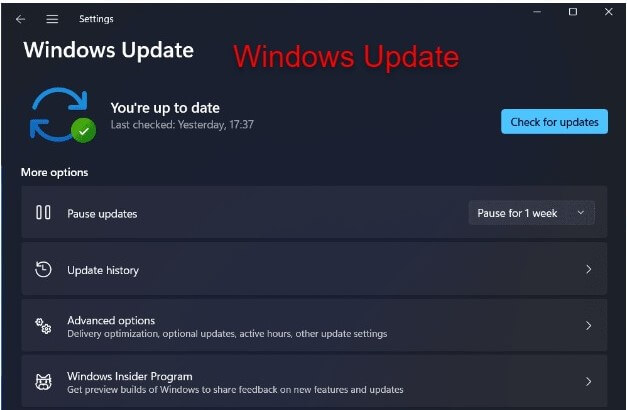
Step 3: Click on Check for updates.
Step 4: Download and install all your updates and restart your PC.
I hope you find the above solutions helpful. If you still face any issues, please reply in the comment section. If you have any other steps, then please share them with us. Do share this article with your friends and family.
Related: