Last Updated on March 7, 2021 by Bestusefultips
Change default Windows 7 font settings? It’s easy to change font settings in Windows 7 including font size, windows font style and adjust ClearType text for LCDs such as Pocket PC screens, laptop screens, and flat-panel monitors. This ClearType font looks almost as sharp and clear on your Windows computer screen.
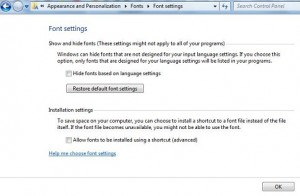
In Windows font settings of your device, you can see only that fonts that will work with your language settings, show or hide fonts manually, install font files using shortcuts and if not change any of these options then restore default font settings on your Window 7 PC. Follow below given complete guide steps to change font settings in Windows 7 / Windows PC.
You might like this:
How to change screen resolution in Windows 10
How to increase or decrease font size in Windows 10
How to turn off auto-update in Windows 7
How to change font settings in Windows 7 or Windows PC
Step 1: Tap and click on the “Start” menu
Step 2: Tap on “Control Panel”
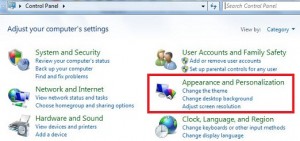
Step 3: Tap on “Appearance and Personalization” category
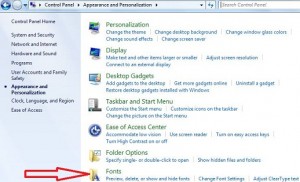
Step 4: Tap on “Fonts”
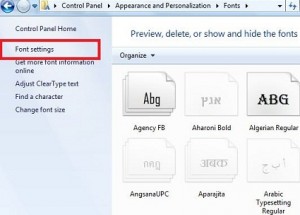
Step 5: Tap on “Font settings” in top of the left sidebar
You can see the option to show and hide fonts in windows 7 based on language settings and allow fonts to be installed using a shortcut. To save space on your computer, you can choose to install a short cut to a font file instead of the file itself. Choose which fonts appear in your programs and how you want fonts to be installed on your Windows computer. If the font file becomes unavailable, you might not be able to use the font.
Step 6: After change font settings in Windows 7 PC, tap on “OK”. That’s all.
Read Also: How to turn on dark mode in Windows 10
Above you can see the simple process of change font settings in Windows 7 / Windows PC. Did you find the above process helpful? Please let us know on the below comment box and connect with us for daily latest updates!
