Last Updated on June 12, 2023 by Bestusefultips
By default, turn on auto-sync Android devices. Here’s how to turn on/turn off auto sync in Android (Oreo) devices. Turning on auto-sync in your Android will automatically sync app data, contacts, SMS, Drive, Gmail, and other data to your Google account. This auto-sync feature reduces battery life to update apps & other data regularly in the background. You’ll individually turn off sync on your Android devices. Just enable the items you want to sync with your Google account.
Read More: How to Add Google Account on Android
How to Turn On/Turn Off Auto Sync Android 8.1 (Oreo)
There are two ways to disable auto-sync in Android 8.1 devices.
Disable Automatically Sync Data in Android Oreo 8.1 & 8.0
Step 1: Open Settings in your Android 8.1.
Step 2: Tap on Users & Account settings.
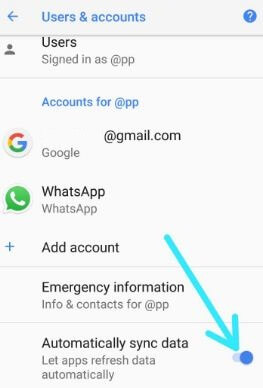
Step 3: Toggle off Automatically sync data.
You can see this pop-up message on the screen: Turn auto-sync data off?
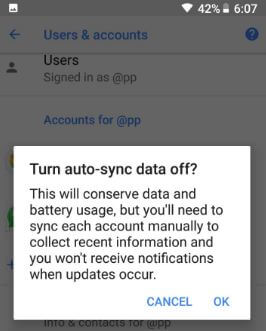
Step 4: Tap on OK to disable it.
To back up recent data in your Google account, you’ll need to manually enable sync in your Android Oreo 8.1 and other devices.
Enable/Disable Sync in Android 8.1 (Oreo)
Step 1: Open Settings in your Android 8.1.
Step 2: Tap on Users & Account settings.
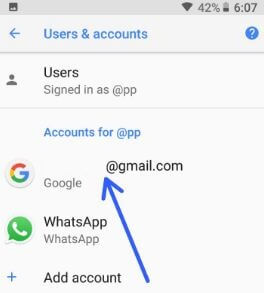
Step 3: Tap on the Account name you want to disable sync.
Here you can see your Google account settings, such as account preferences, personal info & privacy, Account sync, and more. Also, disable WhatsApp contact sync in these settings.

Step 4: Tap on Account Sync.
A list of items syncs with your Google account view on your Android phone or tablet.
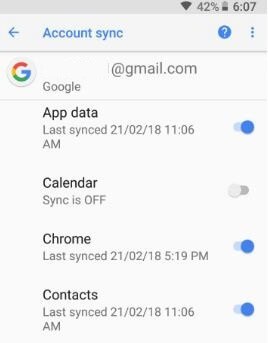
Step 5: Disable sync if you don’t want to sync.
And that’s all. Did you find the above article helpful to turn off auto-sync Android 8.1 Oreo? If you have any problem, please tell us in below comment section. We will respond as soon as possible.
Read Also: