Last Updated on March 7, 2021 by Bestusefultips
There are several lock screen security options available to unlock your Samsung Galaxy Note 9 including a rear-mounted Fingerprint scanner, Iris scanner, Face Unlock, Pattern lock, PIN number, Pattern, and more. But in this tutorial, I’ll teach you how to set up the Iris scanner on Galaxy Note 9 Phablet. Iris scanning is one of the best and secure ways to unlock your Note 9. When you set up Iris scanning on Note 9, keep away your device from direct sunlight, Iris scanner does not work properly in this condition.
Several users reported can’t recognize the Iris issue. There are several reasons for Iris scanning not working such as wearing glasses or contacts, dust & dirt on Iris camera, direct sunlight, and more. Follow the below-given step by step process to set up the Iris scanner on Galaxy Note 9.
Read Also:
- How to set up fingerprint on Samsung Galaxy Note 9
- How to record slow-motion video on Galaxy Note 8
- How to set up and use face recognition Samsung Note 8
- How to set up Samsung pay on Galaxy Note 8
- How to Set up and use face recognition on Samsung Note 10 and Note 10 Plus
How to Set Up Galaxy Note 9 Iris Scanner

Currently, Iris scanner features are supported on Samsung Galaxy S8, S8 Plus, Galaxy S9, S9 Plus, and Galaxy Note 8 devices. You’ll set up Iris scanning in Note 9 using lock screen & security settings. Apply below-given settings to use the Iris scanner on Galaxy Note 9.
Step 1: Swipe down the notification panel and tap the Settings gear icon.
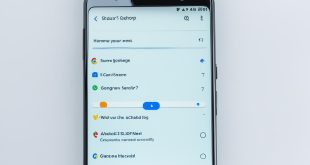
Step 2: Tap Biometrics and security.
Here you can see an Intelligence scan, Face recognition, Iris scanner, and Fingerprint scanner.
Step 3: Tap Iris scanner under Biometrics.
Step 4: Tap Continue.
To securely use Iris scanner, you’ need to set a PIN number, Password, or Pattern lock.
Step 5: Create a PIN number, Pattern, or Password.
This will use if not unlock your device using fingerprint. When this type of situation occurs, unlock your Samsung Note 9 using security you set up such as Pattern lock or PIN number or Password.
Step 6: Follow the on-screen instruction to set up & use the Iris scanner on Note 9.
Step 7: Tap Continue.
Step 8: Hold your device about 25-35 cm away from your face with the screen facing towards you. Position your eyes in the circles shown on the screen.
Step 9: Wait until 100% complete Iris scanning on Note 9.
Step 10: Tap Done.
Now unlock your galaxy Note 9 using Iris recognition you enabled. You’ll use Samsung Galaxy Note 9 Iris scanner feature to purchase apps or other payment when using Samsung Pass. Also, enable the Iris scanner when the screen turns on without use a PIN or password.
How to Remove Iris Scanner in Galaxy Note 9
Settings > Lock screen & security > Phone security > Iris scanner > Manage Irises > Remove Iris data > Remove
Now your set up Iris data has removed from your Samsung note 9 devices.
And that’s it. I hope this tutorial helpful to set up the Iris scanner on Galaxy Note 9. If you have any questions, tell us in below comment box. Stay and connect with us for the latest updates.