Last Updated on March 7, 2021 by Bestusefultips
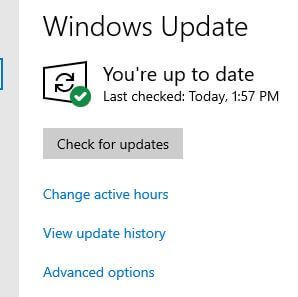
By default automatically check Windows update in your PC or Laptop? Want to stop automatic updates on Windows 10/8/7? Here’s how to pause updates in Windows 10 desktop. You can manually check for system update in Windows PC using update and security settings. Also view updates history in your device.
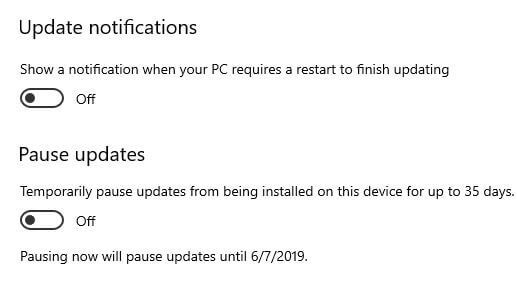
Turned off pause updates by default in your Windows device. When enable pause updates, it’ll temporarily pause Windows 10 update for up to 35 days. When updates resume, that device will need to get the latest updates before it can be paused again. Follow below given step by step process to stop or pause updates in Windows 10.
You May Interest This:
How to change language in Windows 10
How to turn off auto-update in Windows 7
How to change lock screen timeout on Windows 10
How to pause updates in Windows 10 PC or Laptop
You can stop Windows 10 updating using below given update & security settings in your desktop PC.
Step 1: Tap Windows start menu
Step 2: Tap Settings gear icon
Step 3: Tap Update & Security
Here you can see Windows update, Windows security, back up, find my device and other options.
Step 4: Tap Advances options under Windows update section
By default disable pause updates in your Windows PC.
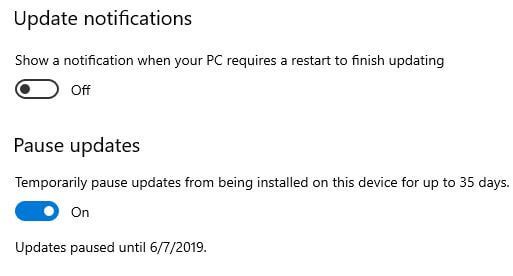
Step 5: Turn on Pause updates toggle
Now pause Windows updates temporarily from being installed on your device up to 35 days. Also automatic download updates in Windows 10, even over metered data connections (Charge may apply).
Choose when updates are installed in PC
After complete Windows 10 updating, you can choose when feature updates are installed. Choose from Semi-annual channel (Targeted) or Semi-annual channel.
And that’s all. I hope this little tutorial useful to pause updates in Windows 10 PC or laptop. If you have any kind of trouble, tell us in below comment box. Stay and connect with us for latest Windows 10 tips and tricks.
