Last Updated on March 7, 2021 by Bestusefultips
By default set Windows 10 lock screen timeout. Here’s how to change lock screen timeout on Windows 10 for power off or sleep. After complete screen timeout, you’re screen goes to sleep when you take a break from your PC. It will useful to save battery life and energy in your PC or laptop.
You can adjust Windows 10 lock screen timeout to minimum to improve battery life of laptop or save energy in Windows PC. Increase or decrease Windows 10 screen timeout using lock screen settings. Follow below given step by step process to set or change lock screen timeout on Windows 10 Laptop.
Don’t Miss This:
How to enable dark mode in Windows 10
How to change default theme in Windows 10
How to change Windows 10 display settings
How to change lock screen timeout on Windows 10 PC
You can change screen timeout settings on Windows 10 display using below given two different methods.
1st Way: Change lock screen timeout settings Windows 10
Step 1: Right click on your Windows 10 PC or laptop
Step 2: Tap Personalization
This setting includes background, colors, lock screen, themes, fonts, start and taskbar settings.

Step 3: Tap Lock screen

Step 4: Scroll down at the end of the page and tap Screen timeout settings
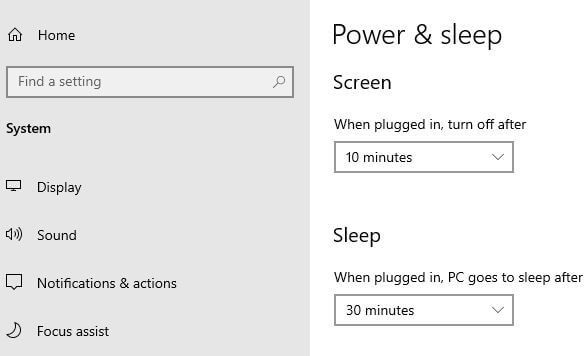
You can see power and sleep option for screen timeout. By default turn off screen after 10 minutes of inactivity.
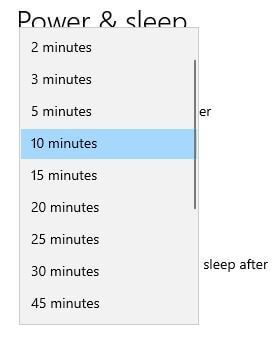
Step 5: Choose screen time from 1/2/3/5/10/15/20/25/30/45 min/1 hours/2 hours/3 hours/4 hours/5 hours/Never
Also change sleep time in Windows 10 PC or laptop. By default set 30 minute after that PC goes to sleep.
Step 6: Choose sleep time from 1/2/3/5/10/15/20/25/30/45 min/1 hours/2 hours/3 hours/4 hours/5 hours/Never
Also choose never if you don’t want to sleep your Windows 10 PC or laptop.
2nd Method: Change lock screen timeout on Windows 10
Step 1: Tap Start button from bottom left side on your Windows 10
Step 2: Tap settings gear icon
Step 3: Tap Personalization
Step 4: Tap Lock screen from personalization menu left side
Step 5: Tap Screen timeout settings at the end of the page
Step 6: Now set Windows 10 screen timeout to power off
Step 7: Adjust Windows 10 sleep time to PC goes to sleep after complete time
And that’s it. Do you still have questions about change lock screen timeout on Windows 10 PC? Feel free to leave them in the below comment section and we’ll do our best to help you out!