Last Updated on October 20, 2022 by Bestusefultips
Are you confused about which SIM you can use to set up calls and data? If not, then don’t worry about this issue, in this article, we can see how we can manage dual SIM settings in Android. In your Android 12 (Add a number using eSIM) and 11 devices, you can manage mobile data, set default SIM, activate dual SIM (eSIM), and many more settings with a few clicks. You can do SIM selection at your convenience. Also, you can manually set up your default SIM card by going to the setting menu.
Settings are different as per the Android Device & its version. If you are using Android 9 and 10, you can change SIM settings, manage settings, enable and disable SIM and much more. You can change the name of your SIM and color using the SIM card setting. The SIM controller app or android dual SIM manager manages your SIM card. This article will show the steps to configure dual SIM settings in Android 12/11/10 devices.
How to Manage Dual SIM Card on Android 12/11/10/9 (Pie)
Below you can manage Android 12 and Android 11 dual SIM settings.
Change SIM Settings on Android 12 and Android 11 (One SIM + One eSIM)
Step 1: Go to Settings.
Step 2: Tap on Network & internet.
Step 3: Tap on SIMs.
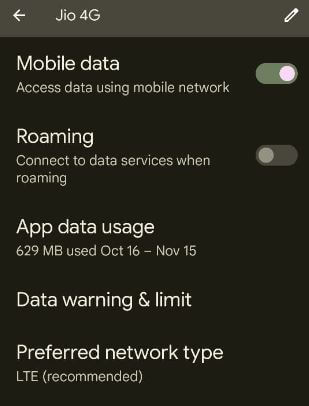
Step 4: Enable or disable mobile data, roaming, check app data usage, set data warning & limit, and set preferred network style in your Android 12 stock devices.
Change the SIM Name and Color on Android 12/Android 11
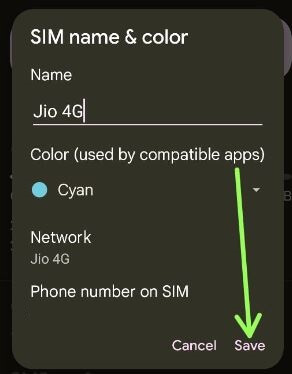
Settings > Network & internet > SIMs > Pencil icon at the top > Change the SIM name and color you want to use > Save
Turn Off/Disable SIM Card Android 12/11
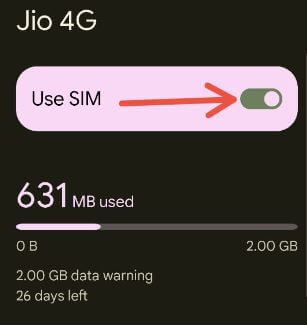
Settings > Network & internet > SIMs > Toggle off Use SIM > Yes
Configure Dual SIM Settings in Android 10 and Android 9 (Pie)
Settings > Network & internet > Choose a SIM > Change the Settings you want
Change SIM Name and SIM Color in Android 10/Android 9 (Pie)
Using the network and internet settings, you can set or change the default SIM name and choose the SIM color from Teal/Blue/Indigo/Purple/Pink/Red.
Settings > Network & internet > Mobile Network > Pencil icon > Enter name and choose SIM color > Save
Read Also:
Configure Dual SIM Settings in Android 7.0 (Nougat)
Step 1: Go to Settings.
Step 2: Under the wireless & network section, tap SIM cards.
Here you can see below two sections and other Samsung smart dual SIM settings.
Manage SIM Capabilities
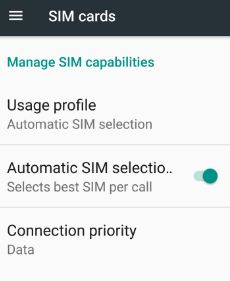
Manage SIM capabilities include Automatic selection of SIM, usage profile, and can do other settings. It’s pretty much easier for you to manage DUAL SIM on Android 12 and 11 Devices.
Usage Profile
In the usage profile, we can see the steps to set up DUAL SIM in Android because of these, you can easily manage the call, texts, data, and much more. Select the SIM card that uses data and calls in your Android Device. Easy to change the name of the SIM card and its color. Also, set your Personal SIM and work SIM too.
Connection Priority
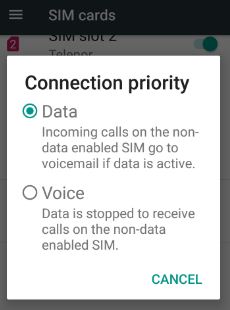
You can choose connection priority from Data or voice.
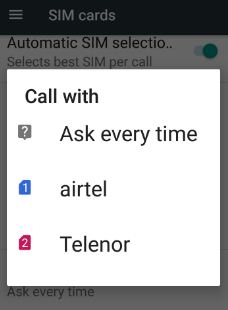
Automatic SIM Selection
When enabling automatic SIM selection in Android devices, whenever you call or message, it will ask you for which SIM card is used to call or message.
Preferred SIM
This section includes settings of cellular data, calls, and SMS messages.
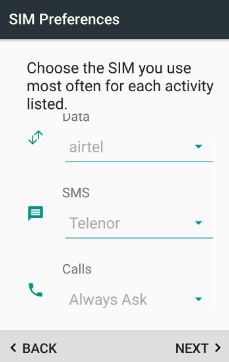
Cellular data: Select a SIM card for the mobile data network.
Call: Select SIM for outgoing calls or set “ask every time” so when calling someone, ask which SIM card to use.
SMS: Select the SIM card to use to send messages.
Change SIM Card Name and SIM Card Color in Android 7.0 (Moto G4 plus)
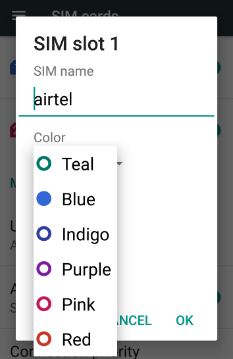
Settings > Wireless & networks > SIM cards > Tap SIM slot 1 / SIM slot 2 > Enter SIM name & select color want to change > OK
Enable/Disable SIM Card Android 7.0 (Nougat ) and 6.0 (Marshmallow)

Settings > Wireless & networks > SIM cards > by default enable both SIM card > turn off toggle button of SIM want to disable SIM
That’s the end, above are the details that will help you to change the dual SIM setting in your Android Device. If you find this article helpful, don’t forget to share it with your friends.