Last Updated on March 7, 2021 by Bestusefultips
Want to set up private DNS or change the DNS server on the latest Android devices? Here’s how to change the DNS settings on Android 9 Pie. You can find private DNS mode under network and internet settings in your Android. Also, set up Google Public DNS over TLS on Android Pie devices. Android Pie supports only DNS over TLS. In the latest android 10 devices, you’ll choose Private DNS provider hostname also.
You’ll enable private DNS with 1.1.1.1 on your latest android devices such as Pixel 3, Pixel 3 XL, Google Pixel, Pixel 2 XL, etc. To secure and faster internet speed, you can change your DNS settings in your latest Android devices. It’s quite easy to change settings individually on a phone or laptop or router. By default, your device uses private DNS with all networks that can use private DNS. Follow the below-given step by step process to add a custom DNS server on Android 9 Pie devices.
Read This:
- How to track a lost android phone using Google Maps
- Android Q expected features
- How to connect Bluetooth speaker to Windows 7
- How to set up VPN on Android Lollipop
- How to turn on Live Caption on Android 10
How to Change DNS Settings on Android 9 Pie
Google introduces Private DNS settings in the latest android devices to change the DNS server on android devices. Different Android OS has different settings to Change DNS settings for Wi-Fi, mobile data and other settings. Check out below given settings to change DNS on Android 10, 9 Pie, and other latest android OS devices.
Change Private DNS Mode on Android 10
Step 1: Go to Settings.
Step 2: Tap on Network and Internet.
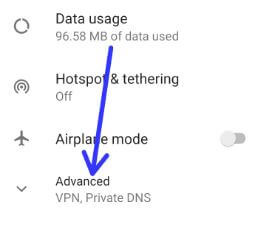
Step 3: Tap on Advanced.
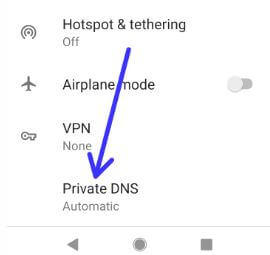
Step 4: Tap on Private DNS.
By default set Android private DNS Automatic on the latest Android 10 devices. Three options are available including Off, Automatic, or Private DNS provider hostname.
Step 5: Enter a hostname of the DNS provider and tap on Save.
For Android 9 Pie and 8.1 Oreo:
Step 1: Swipe down the notifications panel twice from the top of the screen and tap the Settings gear icon.
Step 2: Tap Network and Internet.
Step 3: Tap Advanced at the end of the page.
Step 4: Scroll down up to end and tap Private DNS.

By default Google Private DNS mode set as automatic.
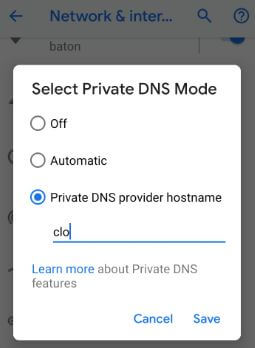
Step 5: Choose a Private DNS provider hostname.
Step 6: Enter the hostname of the DNS provider and Tap Save.
You’ll use alternative DNS from Google, Cloudflare, Open DNS, etc. Cloudflare is one of the most secure and faster DNS servers. In these settings, remember IP addresses are 1.1.1.1 and 1.0.0.1. In Google’s public DNS, IP addresses you remember are 8.8.8.8 and 8.8.4.4. You can easily change your DNS settings, so find which one is best and super fast speed DNS for your android device or laptop device.
And that’s all. We hope this makes it clear how to change DNS on Android 9 Pie. If you have any kind of trouble, tell us in below comment box. Stay and connect with us for the latest updates.