Last Updated on July 1, 2020 by Bestusefultips
Here’s how to manage and setup VPN Android Lollipop 5.1.1 device and other Samsung Galaxy devices. A virtual private network (VPN) is best to secure your pc or smartphone computer internet connection and protect your sending and receiving data. First of all, add a VPN network on your Android Lollipop 5.1 & KitKat 4.2 device. You can edit the VPN network name, choose VPN type from various options such as PPTP/IPSec Xauth RSA/IPSec Hybrid RSA/L2TP/IPSec PSK, etc. and server address on your Android device. Also, use shows advanced options for DNS search domains. Using these details easily set up a VPN android device.
If you can use a VPN network on your android phone or android tablet then select a VPN profile that wants to use and always stay connected. Network traffic will only be allowed when connected to this VPN network. Follow below-given steps to manage and setup a VPN Android Lollipop phone or tablet device.
Read Also:
- How to change DNS on Android 9 Pie
- How to find a Mac address of Amazon Echo
- How to setup static IP address android device
How to Setup VPN Android Lollipop 5.1.1
Step 1: Tap on “Apps” on your Android Lollipop device home screen.
Step 2: Open the “Settings” app on your phone or tablet.
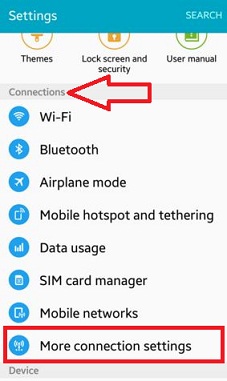
Step 3: Tap on “More connection settings” under the connections settings.
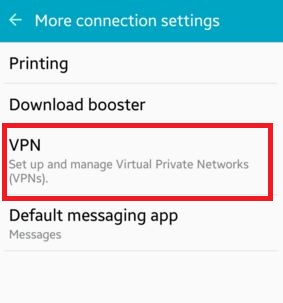
Step 4: Tap on “VPN”.
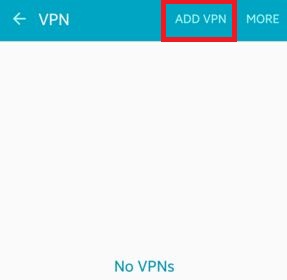
Step 5: Tap on “Add VPN” from the top side.
You can see the above screen on your android phone or tablet device.
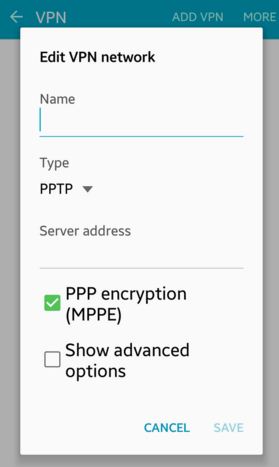
Step 6: Enter the name of the VPN network, choose network type from the given list and server address.

You can also use advanced options which contains DNS search domains name
Step 7: Click on the “Save” button.
That’s all. Now create a VPN network on android lollipop, KitKat, and other android devices.
If you’re having problems when following the above steps to set up a VPN android lollipop device, don’t hesitate to let me know on the below comment box. It would be a pleasure to help you and connect with us for daily latest updates.